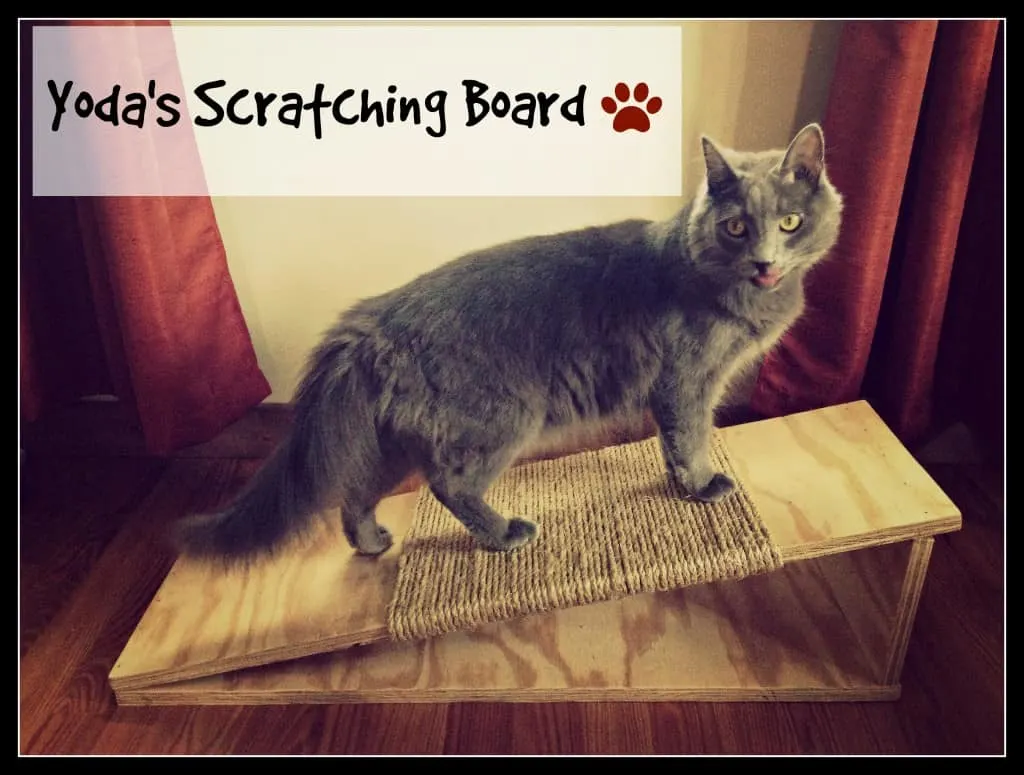
Did you know that cat scratchers are among the essential furniture that your cat needs? It’s necessary for him, but it also does a wonderful job at keeping him from scratching other nice pieces of furniture in your comfy home. Although pre-made cat scratchers are widely available in pet stores or online, it is extremely fun and easy to make one with your own hands. It’s also an enjoyable project to do with your kids on a lovely weekend. Read on to know how to make your own DIY Cat Scratcher Board?
A little bit of wood, a little bit of sisal rope, and done! Well, it’s almost that simple 🙂 let me give you a step by step guide on how to make a DIY cat scratcher?

Required material
To make a DIY cat scratcher, you’ll need the following items:
- Wooden plank
- Natural sisal rope
- Catnip (optional)
- 1 pencil + notebook
- Ruler
- Saw
- Wood glue
- Staple gun & heavy duty staples
- Hammer
- Nails
- Screws
- Sandpaper for wood
- Paint/varnish (optional)
Measure and draw your DIY Cat Scratcher Board
It is important to adapt the size and strength of your DIY cat scratcher board according to your cat’s size or weight. For example, if your cat is real big (10 lbs+), you may want thicker wood that will resist the tremendous weight of this humongous beast 🙂 It’s also important that your cat has enough room to stretch on the board fully!
Whatever you decide, make sure you plan and draw a simple plan of your desired scratching board.
This step is essential as it enables you to make sure that everything will fall in place when you are done cutting the planks. My drawings and instructions are designed for a medium-sized cat (7-8 pounds).
Make it Paw by Paw
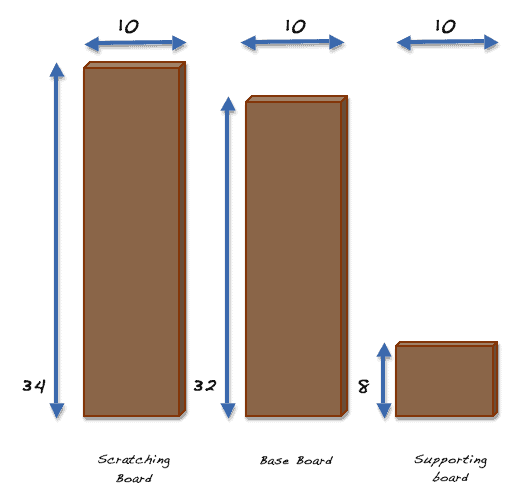
All measurements are in inches.
Step 1: Cutting the boards (& painting them)
Measure and cut three planks that will be used to make the cat scratching board. The thickness of the planks is not indicated, but it should be thick enough, so your cat’s weight doesn’t bend the plank.

Now that the boards are ready, it’s important that you choose whether to leave them like that or give them a personal touch. If the wood is not stained, you could decide to keep it this way, but you can also choose to apply some varnish or paint. If that’s the case, make sure you prepare your board before going into the next step. Whatever you decide, I believe it’s good to use sandpaper to smooth the edges and make sure your cat won’t end up with a splinter in his paws.
Step 2: Preparing the DIY Cat Scratcher Board (longest step)
Time to prepare the actual scratching board before assembling it to its support and base.
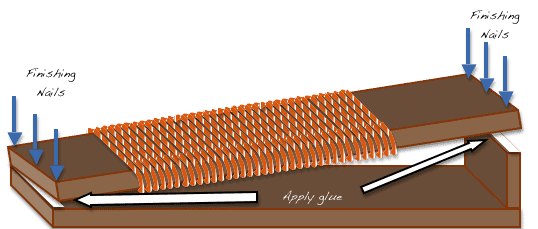
- Take the sisal rope, the glue, and your stapler, things are getting real.
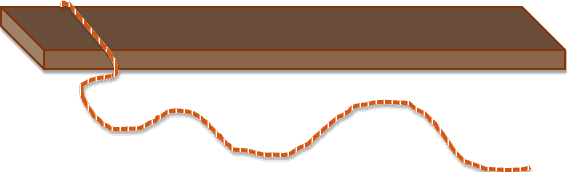
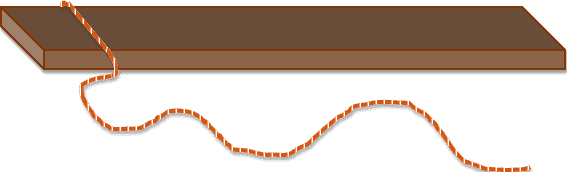
- Start by stapling the beginning of the sisal rope under the plank.
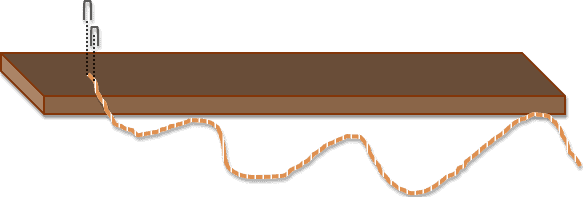
- Turn the board and use the glue to trace a straight line on the board where the rope will lay on.


- Go ahead and press the rope on the glue and pull as hard you can to make it right before rotating the board.
- When the board is turned, staple the sisal a first time close to the edge (1), pull as hard as you can again and staple it next to the other edge (2).
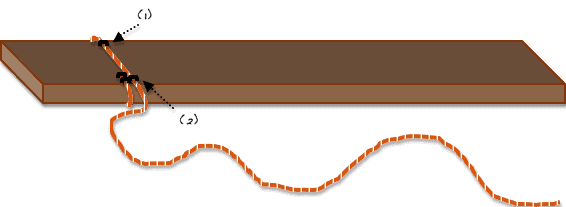
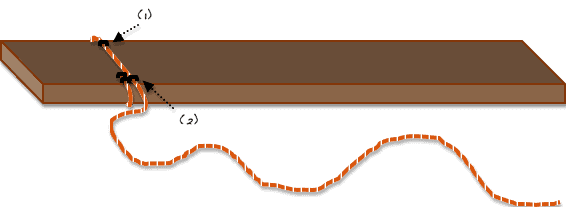
- Make sure you always staple on the same side of the board. This side will be hidden for visual purposes and also because it will prevent your cat from hurting himself on the staples.
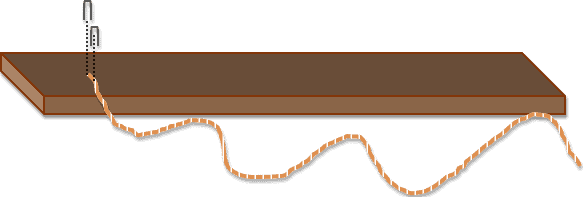
- Keep on rolling! Simply repeat the same process until you are satisfied with the amount of sisal rope disposed on the board (or if you simply run out of it like me 🙂 ). From time to time, apply a line of glue to make sure it holds tight and remains straight. Do not use too much, though; the staples should be strong enough except if your beast turns into a big green monster.
- It should look like this on the backside.


- And like this on the front side.


Step 3: Putting it all together to make the DIY Cat Stretcher Board
Now you should have everything ready to start assembling the three elements of our cat scratching board!
- First, assemble the support to the base. I used wood glue + a drill and a few screws to reinforce the structure.
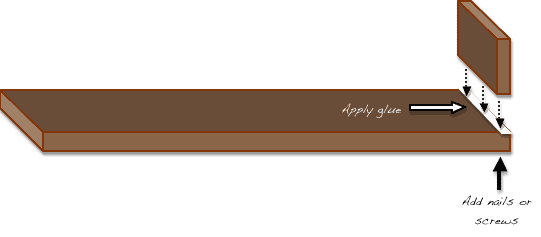
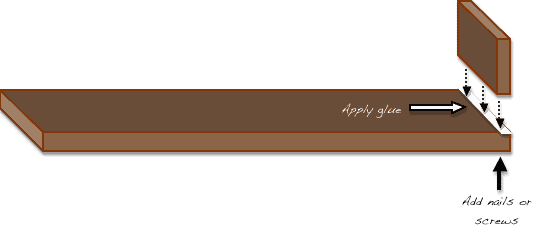
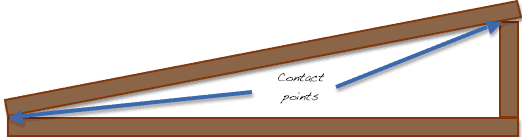
- Now the tricky part is to put the scratching board on top of the support and base planks. You have two options here. Option one is the simplest and has a more rustic finish: don’t worry about it and just nail and glue the scratching board to the rest (just a thin line of glue). It’s tricky because the contact area is relatively small. You need to be quite precise here, and you might need extra hands to help align it perfectly while fixing the board.

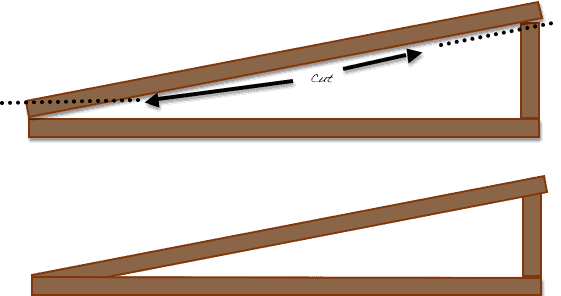
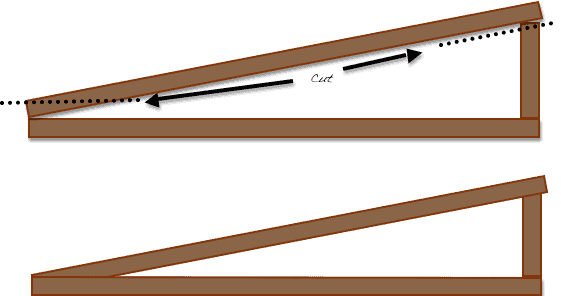
- Option two is trickier, but the result will be a smoother look and a stronger structure: adjust the cutting angle of each board, so they perfectly stick and align with each other. It’s easier to understand by looking at the images below. The original cut makes the contact points relatively small.
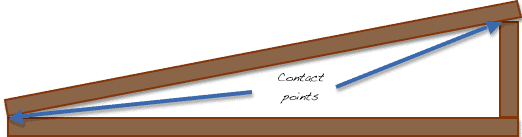
By cutting the edges at the right angle, the contact surface is greatly increased and enables to have the best performance in terms of strength of the overall structure (as pictured below).
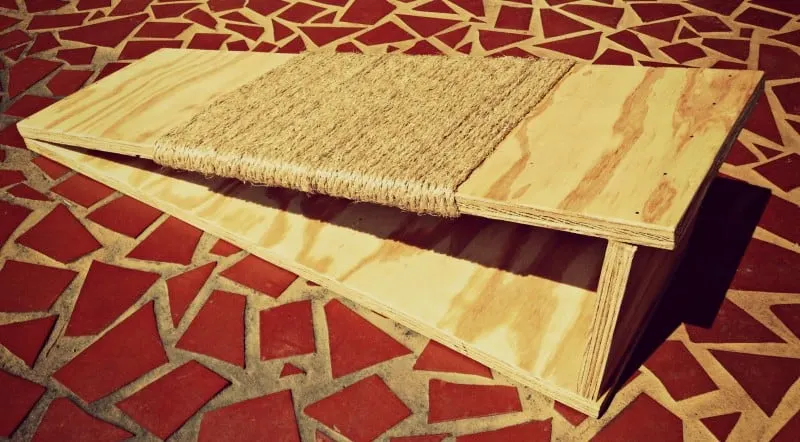
When you are done assembling this beauty, let it dry overnight. The glue might leak, so make sure to protect the underlying surface. Keep an eye on it when you are just done, you might already see some excess glue that you can easily remove with a cloth.
Test your DIY Cat Scratcher Board


Now that your board is ready to present it to the beast! Give him some time to get familiar with it as he may be shy in the beginning wondering what this thing is. To help him out, sprinkle some catnip on it! Don’t force him or you will scare him, and chances are he might not even want to use it after all. Create a positive experience and reward him with treats when you see him using it. Thanks for following us at Fluffy Kitty! Stay updated with us on social media to keep updated on all DIY projects and new articles.

Why Is Homemade Scratcher Board Good for Your Cat?
Scratching a homemade scratcher board is good for your kitty and offers plenty of health benefits like:
- Keep the cat’s claw sharp and healthy by shedding lose layers of claws.
- It indulges the cat in stretching, an excellent exercise to help your kitty stay fit and active.
- Scratching falls in the common behavior of the cat, meaning she feels happy and satisfied while doing so.
Kathleen Legler
Wednesday 20th of November 2019
Can you please make me one of these, but make the rope cover the whole surface? Tell me what you would charge for it, please. Thanks
The Fluffy Kitty
Tuesday 16th of June 2020
Hey Kathleen, sorry to get back to you so late!!! Right now we actually don't offer this service! Maybe in the future though!! Paul would be good at it ;)
Charley Prizio
Thursday 13th of October 2016
I love what you guys are usually up too. This sort of clever work and reporting!
Brittany, Paul, and Yoda =^^=
Wednesday 19th of October 2016
Hi Charley! Thanks for your support!